https://www.animvfxunion.com/blog/mpcrag


3Dprinting (185) A.I. (925) animation (355) blender (223) colour (241) commercials (53) composition (154) cool (375) design (660) Featured (94) hardware (319) IOS (109) jokes (141) lighting (302) modeling (160) music (189) photogrammetry (199) photography (758) production (1310) python (108) quotes (501) reference (318) software (1384) trailers (310) ves (579) VR (221)
POPULAR SEARCHES unreal | pipeline | virtual production | free | learn | photoshop | 360 | macro | google | nvidia | resolution | open source | hdri | real-time | photography basics | nuke
https://www.provideocoalition.com/color-management-part-12-introducing-aces/
Local copy:
https://www.slideshare.net/hpduiker/acescg-a-common-color-encoding-for-visual-effects-applications
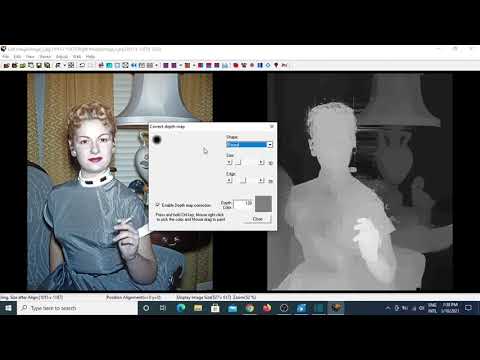
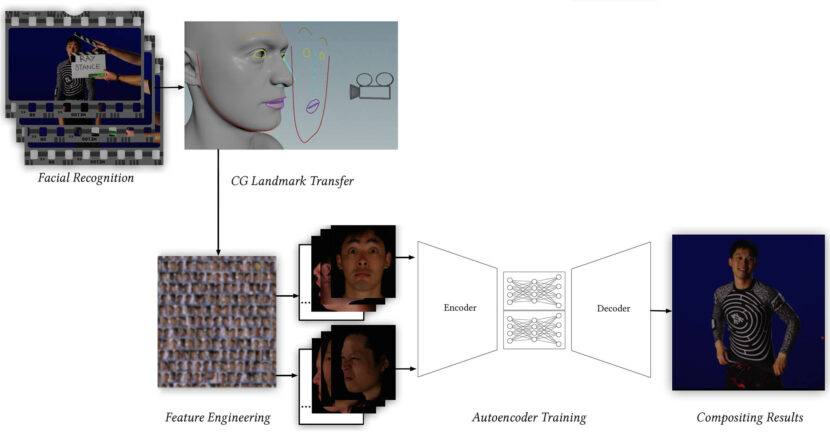
R3DS Wrap4D is an extended version of Wrap designed specifically for 4D processing. It takes a sequence of textured 3D scans as an input and produces a sequence of meshes with a consistent topology as an output.
The solution includes 12 new nodes. At the heart of the pipeline is the FacialWrapping node which combines the power of the BlendWrapping node with the results from the lip and eyelid detector. The idea behind the node is to provide a robust result that doesn’t require cleanup.
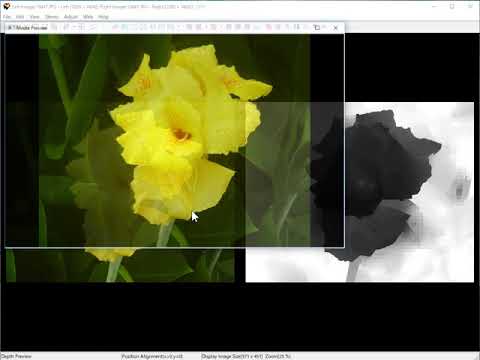
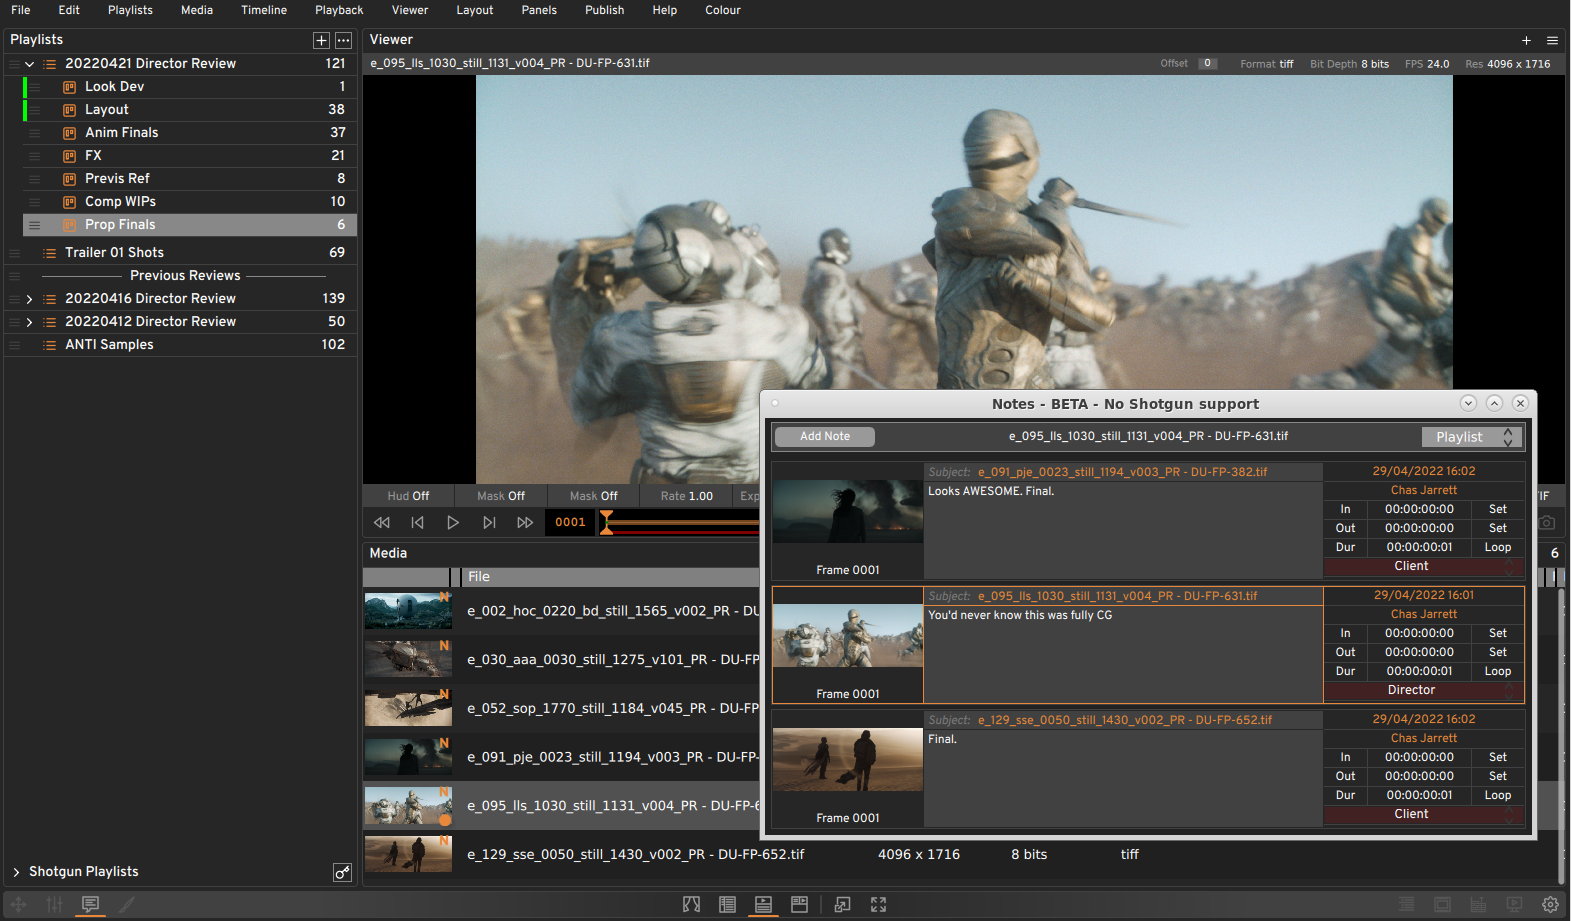
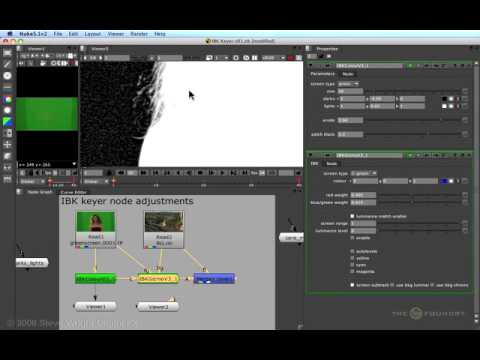
So, what is the IBK keyer? The very non-technical answer to that is that the ‘image- based keyer’ is a proprietary keyer in Nuke that typically deals with classic bluescreen or greenscreen plates (that need keying) by recognizing that these plates do not always have uniform color coverage. We’ve all seen uneven blue and greenscreens; that’s one place where the IBK Keyer can come in handy.

” In this video, I utilized artificial intelligence to generate an animated music video for the song Canvas by Resonate. This tool allows anyone to generate beautiful images using only text as the input. My question was, what if I used song lyrics as input to the AI, can I make perfect music synchronized videos automatically with the push of a button? Let me know how you think the AI did in this visual interpretation of the song.
After getting caught up in the excitement around DALL·E2 (latest and greatest AI system, it’s INSANE), I searched for any way I could use similar image generation for music synchronization. Since DALL·E2 is not available to the public yet, my search led me to VQGAN + CLIP (Vector Quantized Generative Adversarial Network and Contrastive Language–Image Pre-training), before settling more specifically on Disco Diffusion V5.2 Turbo. If you don’t know what any of these words or acronyms mean, don’t worry, I was just as confused when I first started learning about this technology. I believe we’re reaching a turning point where entire industries are about to shift in reaction to this new process (which is essentially magic!).
DoodleChaos”
https://www.bbc.com/news/technology-61550776
Facial recognition company Clearview AI has been fined more than £7.5m by the UK’s privacy watchdog and told to delete the data of UK residents.
The ICO says that, globally, the company has stored more than 20 billion facial images.
Clearview AI takes publicly posted pictures from Facebook, Instagram and other sources, usually without the knowledge of the platform or any permission.
COLLECTIONS
| Featured AI
| Design And Composition
| Explore posts
POPULAR SEARCHES
unreal | pipeline | virtual production | free | learn | photoshop | 360 | macro | google | nvidia | resolution | open source | hdri | real-time | photography basics | nuke
FEATURED POSTS
Social Links
DISCLAIMER – Links and images on this website may be protected by the respective owners’ copyright. All data submitted by users through this site shall be treated as freely available to share.